litterblocks wrote:All storyboards must adhere to a template created by the studio I work for. Is there a way to put this template into TVPaint?
Here's a rough example of the final output. I'd like the camera moves of clips etc to be independent of this dialogue and border.
http://imgur.com/JRFpWDU" onclick="window.open(this.href);return false;

In Flash, I create a document matching the template final size, then re-create the border/dialogue boxes on separate layers in the main timeline. Beneath those layers, I have one layer called "Shots". Each new symbol/keyframe is a 'shot' similar to how TVPaint has 'clips'. I only animate camera moves on the main timeline. This way no matter what changes in the shot, it's always adherent to the template.
Is there a way to re-create this workflow in TVPaint?
I think you could do more or less the same thing in TVPaint , create the border/dialogue boxes on separate layers in the main timeline (as an overlay) and draw the storyboard panels on layers underneath , so the storyboard panels fit inside the template border.
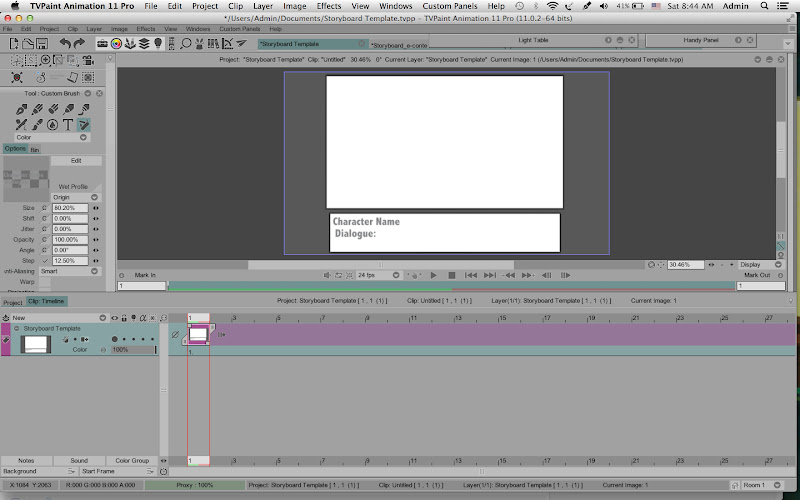
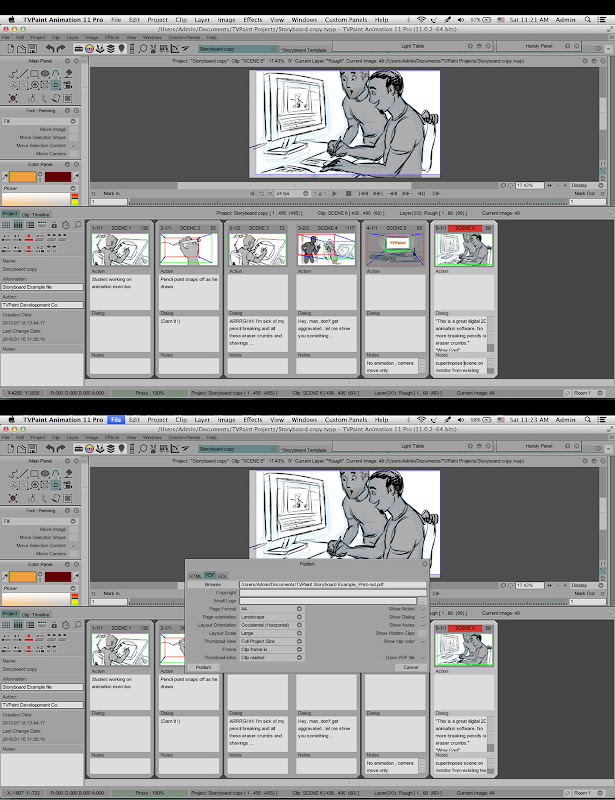
First create and save your Storyboard Template as a separate TVPaint project like this:

Then you can have that Storyboard Template project open at the same time you work on your storyboard/animatic project and simply copy & paste that saved Storyboard Template layer into each new Clip you create in the continuity of your storyboard/animatic ... OR you could reference the Storyboard Template layer on a new layer in each clip using the KeyFramer FX Tool (in the KeyFramer the "Source" would be set to your Storyboard Template project ).
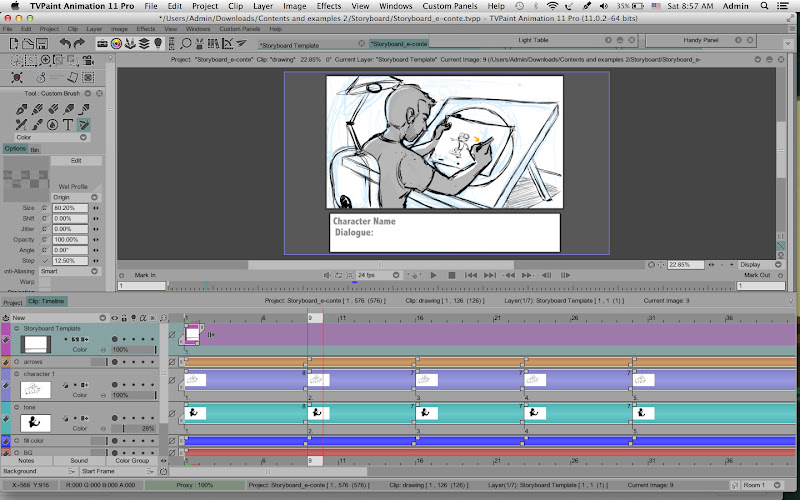
So an individual Clip would look like this , with the Storyboard Template overlay held on the top layer over the entire length of the Clip -

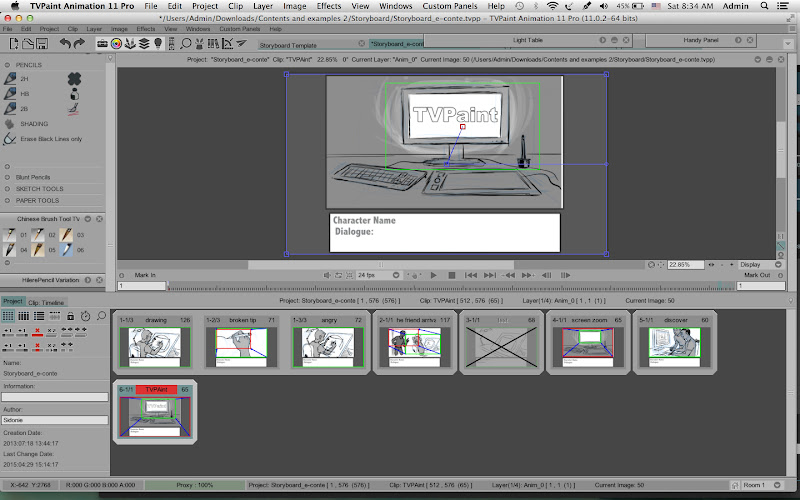
Here is each Clip (scene) as viewed in continuity in the Project timeline -

The main difference in workflow might be this:
I only animate camera moves on the main timeline. This way no matter what changes in the shot, it's always adherent to the template.
The Camera Tool in TVPaint applies the camera moves to each Clip , so each clip can have it's own set of camera moves (or no moves as needed) . So when your render the entire Project (all Clips in continuity) to an animatic movie file , you would render with "Camera View" enabled in the Export panel, so only what is within the Camera View in each Clip will be rendered to the animatic movie file .
For example this is what you would see in the original TVPaint project file:

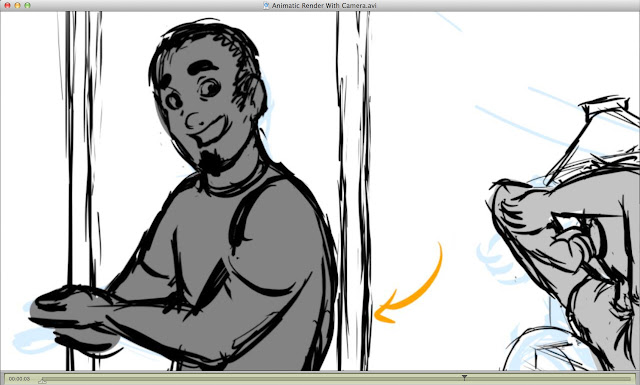
But rendered to an animatic with Camera View , this is what you would see when viewing the animatic :

So, I'm not exactly sure if that is what you want ?
---------
A different approach , using the KeyFramer Tool in the FX Stack -
If you wanted the entire Template frame to show (including the Dialogue box underneath the main frame) in the animatic , then you could render the camera moves using the
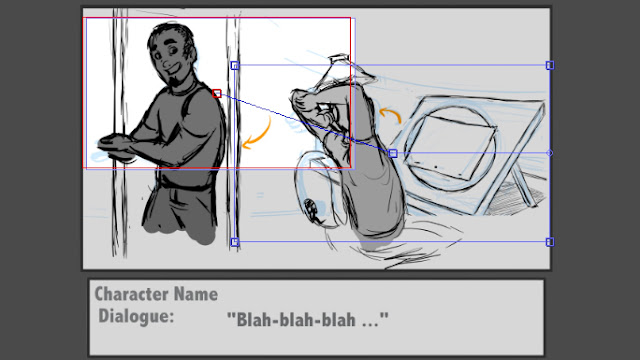
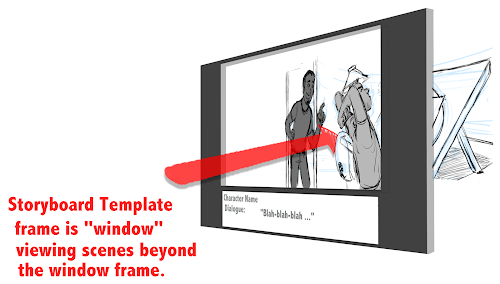
KeyFramer Tool in the FX Stack . In this workflow the Storyboard Template is an overlay on top of the storyboard panel(s) layer(s) as shown previously , but in this case use the KeyFramer Tool to apply the camera moves to the storyboard panels but the Storyboard Template frame stays static , so the template frame is like a "window" you are looking through at the scene beyond the window .

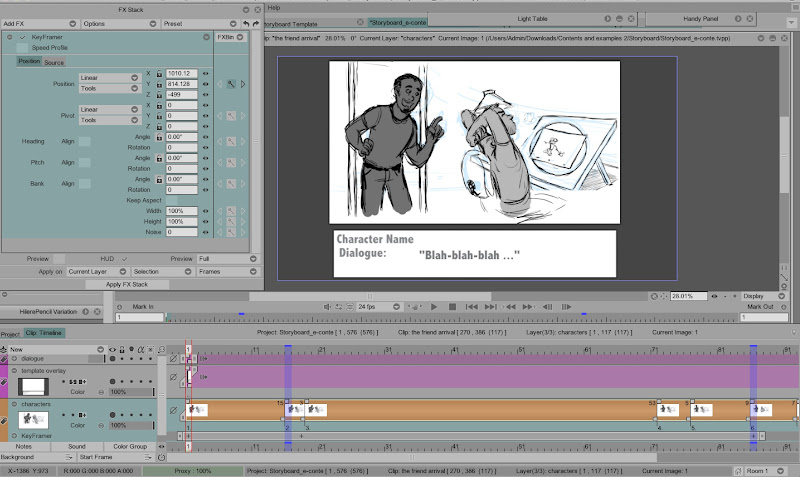
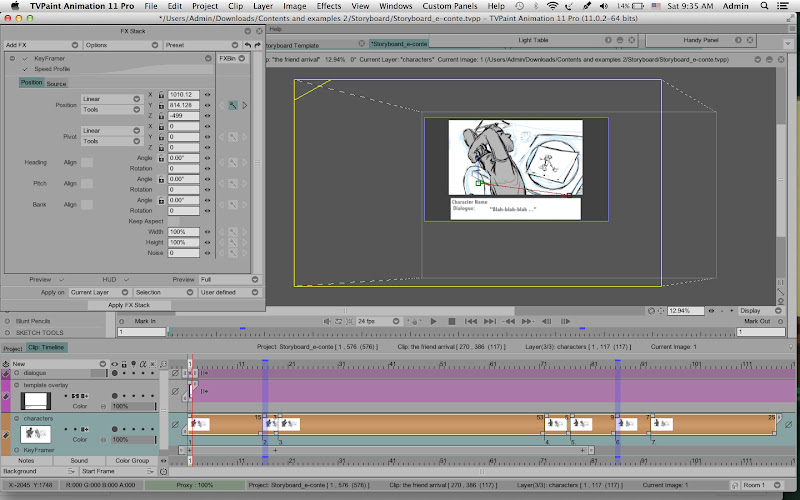
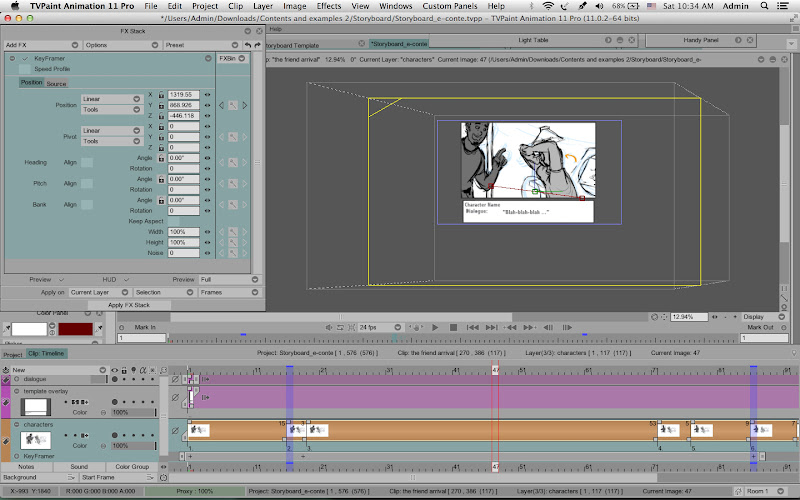
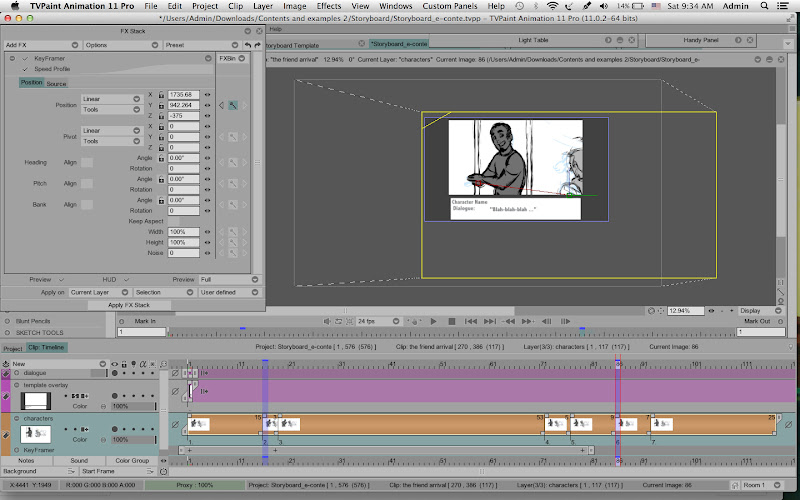
In these two screen captures notice in the first screen capture the numbers in the X-Y-Z coordinates of the KeyFramer at the start and then in the second screen capture notice that numbers in the X-Y-Z coordinates at the end of the move are different . You create the camera move on the artwork by changing these coordinates and setting KeyFrames (the little
+ marks ) to control the duration of the move. (you can also use the Time Profile editor in the KeyFramer Tool to add slow-in and slow-out at the start and end of a move) .
Here's the start of the clip, without the KeyFramer applied yet:

Starting camera position, KeyFramer coordinates -
X=1010.12 , Y=814.128 , Z= - 499

Midway position through the camera move - (notice KeyFramer coordinates changing and progress along path-of-action line)

End camera position, KeyFramer coordinates -
X=1735.68 , Y=942.64 , Z= - 375

You can preview the KeyFramer move by hitting the Playback button . When you are satisfied with the move , select all frames and Apply FX to render the move on the storyboard panel layer . (if you have more than one layer you simply move down to that next layer and re-apply the same KeyFramer FX and repeat ... or if have Merged all the layers you just have to apply the KeyFramer FX move one time. )
Then when you render this project to an animatic movie you set the Export to Project View (
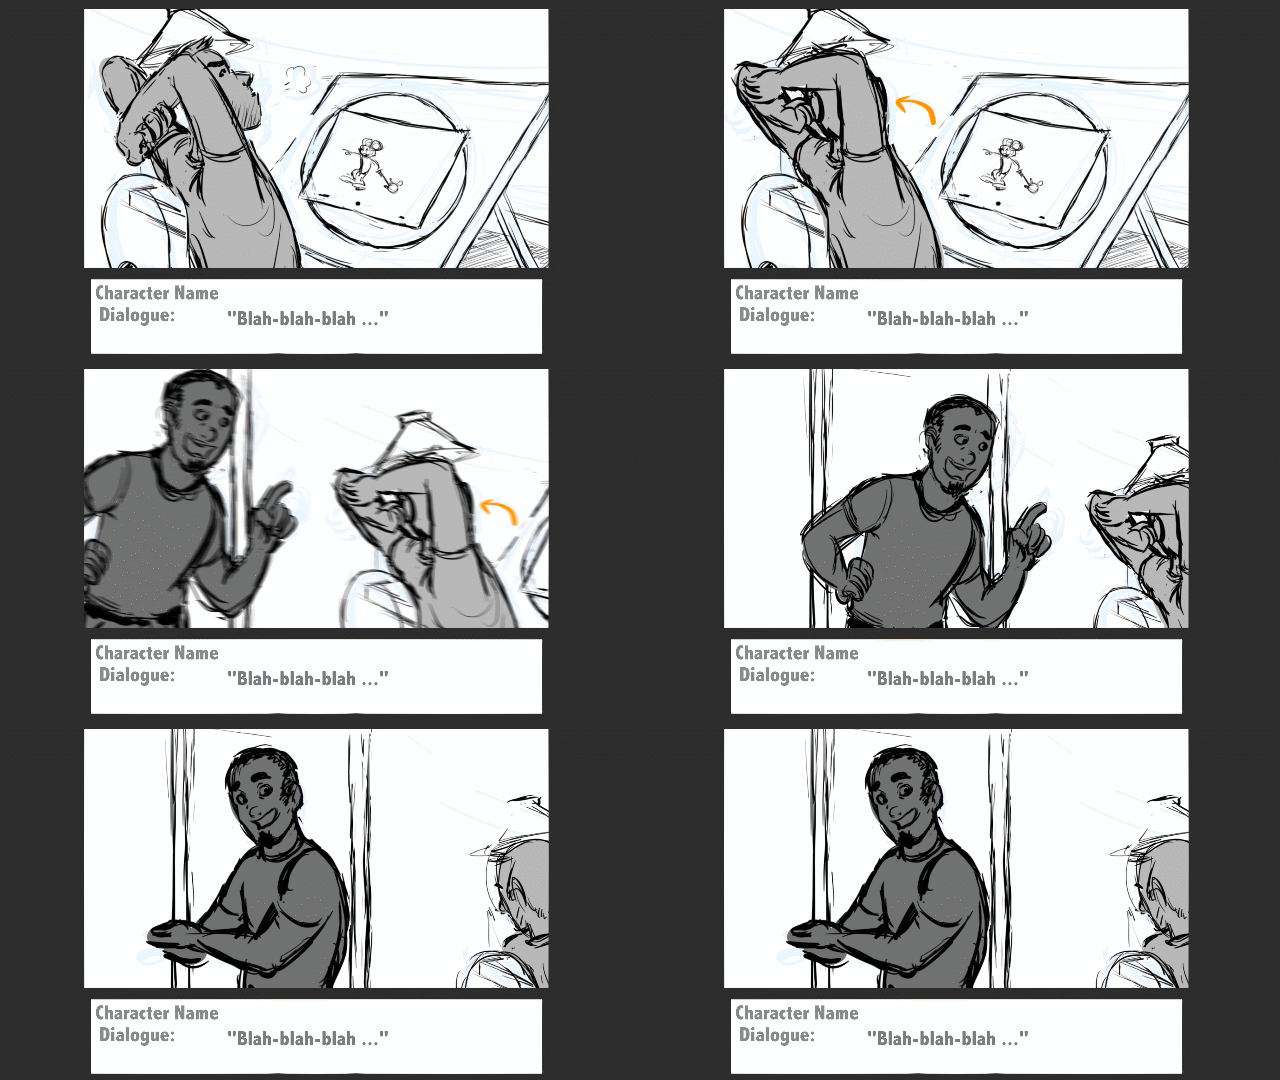
NOT Camera View) , so you will see the entire Storyboard Template frame (including the Dialogue box) rendered in the animatic, as in this sample clip -

(Attached Quicktime movie plays smoother than the embedded .gif)
.

